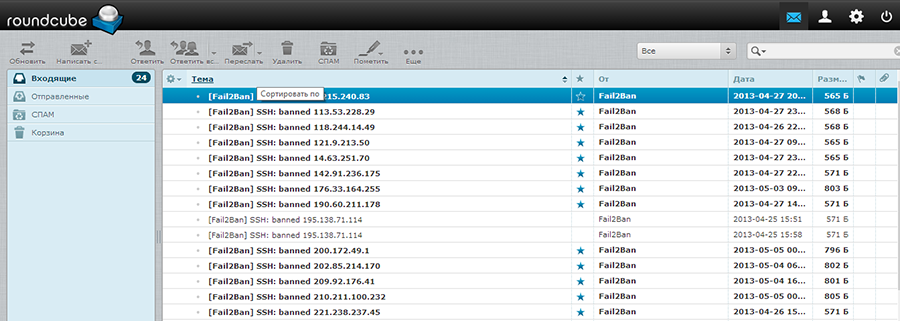
Исходные данные:
Операционная система: CentOS release 6.4. Установка Centos:
Доменное имя: iptel.com.ua
mx-запись: mail.iptel.com.ua 31.131.16.241
Запись PTR:
Hostname: mail.iptel.com.ua
ipv6 выключен; в файлике /etc/hosts: 31.131.16.241 mail.iptel.com.ua mail
Приступим! Для начала обновимся:
Установим основные пакеты:
postfix: MTA
dovecot: MDA
mysql: СУБД. мы будет хранить настройки пользователей в базе данных MySQL
Добавим пользователя:
Отредактируем конфигурационный файл /etc/postfix/main.cf:
queue_directory = /var/spool/postfix
daemon_directory = /usr/libexec/postfix
mail_owner = postfix
default_privs = nobody
myhostname = mail.iptel.com.ua
mydomain = iptel.com.ua
myorigin = $mydomain
mydestination = $myhostname,localhost.$myhostname,localhost
local_recipient_maps = $virtual_mailbox_maps, $virtual_alias_maps, $transport_maps
unknown_local_recipient_reject_code = 550
mynetworks = 127.0.0.0/8
relay_domains = $transport_maps
alias_maps = hash:/etc/aliases
alias_database = hash:/etc/aliases.db
mail_spool_directory = /var/mail
smtpd_banner = $myhostname ESMTP
debug_peer_level = 2
debug_peer_list = 127.0.0.1
debugger_command =
PATH=/bin:/usr/bin:/usr/local/bin:/usr/X11R6/bin
xxgdb $daemon_directory/$process_name $process_id & sleep 5
sendmail_path = /usr/sbin/sendmail
mailq_path = /usr/bin/mailq
setgid_group = postdrop
html_directory = no
manpage_directory = /usr/local/man
config_directory = /etc/postfix
virtual_mailbox_domains = mysql:$config_directory/sql/vdomains.cf
virtual_mailbox_base = /var/vmail
virtual_mailbox_maps = mysql:$config_directory/sql/vmailbox.cf
virtual_alias_maps = mysql:$config_directory/sql/valias.cf
virtual_minimum_uid = 1150
virtual_uid_maps = static:1150
virtual_gid_maps = static:12
virtual_transport = dovecot
dovecot_destination_recipient_limit = 1
smtpd_sasl_auth_enable = yes
smtpd_sasl_exceptions_networks = $mynetworks
broken_sasl_auth_clients = yes
smtpd_sasl_security_options = noanonymous
broken_sasl_auth_clients = yes
smtpd_sasl_type = dovecot
smtpd_sasl_path = /var/spool/postfix/dovecot-auth
content_filter = scan:127.0.0.1:10025
receive_override_options = no_address_mappings
smtpd_client_restrictions =
permit_mynetworks,
permit_sasl_authenticated,
permit
smtpd_helo_restrictions =
permit_mynetworks,
permit_sasl_authenticated,
reject_invalid_helo_hostname,
reject_non_fqdn_helo_hostname,
reject_unknown_helo_hostname,
permit
smtpd_sender_restrictions =
permit_mynetworks,
permit_sasl_authenticated,
reject_non_fqdn_sender,
reject_unknown_sender_domain,
permit
smtpd_recipient_restrictions =
reject_non_fqdn_recipient,
reject_unknown_recipient_domain,
permit_sasl_authenticated,
reject_unlisted_recipient,
permit_mynetworks,
reject_unauth_destination,
permit
smtpd_data_restrictions =
permit_mynetworks,
reject_unauth_pipelining,
reject_multi_recipient_bounce,
permit
smtpd_etrn_restrictions = reject
smtpd_helo_required = yes
smtpd_discard_ehlo_keywords = etrn, silent-discard
smtpd_forbidden_commands = CONNECT GET POST
disable_vrfy_command = yes
#smtp_use_tls = yes
#smtpd_use_tls = yes
#smtpd_tls_auth_only = yes
#smtp_tls_note_starttls_offer = yes
#smtpd_tls_cert_file = /etc/postfix/certs/smtpd.pem
#smtpd_tls_key_file = /etc/postfix/certs/smtpd.pem
#smtpd_tls_CAfile = /etc/postfix/certs/smtpd.pem
#smtpd_tls_received_header = yes
#smtpd_tls_loglevel = 2
Редактируем файл /etc/postfix/master.cf
-o content_filter=spamfilter:dummy
#submission inet n - n - - smtpd
#
# -o smtpd_tls_security_level=encrypt
# -o smtpd_sasl_auth_enable=yes
# -o smtpd_client_restrictions=permit_sasl_authenticated,reject
# -o milter_macro_daemon_name=ORIGINATING
smtps inet n - n - - smtpd
#-o content_filter=spamassassin
-o smtpd_tls_wrappermode=yes
-o smtpd_sasl_auth_enable=yes
# -o content_filter=spamfilter:dummy
# -o smtpd_client_restrictions=permit_sasl_authenticated,reject
# -o milter_macro_daemon_name=ORIGINATING
#628 inet n - n - - qmqpd
pickup fifo n - n 60 1 pickup
cleanup unix n - n - 0 cleanup
qmgr fifo n - n 300 1 qmgr
#qmgr fifo n - n 300 1 oqmgr
tlsmgr unix - - n 1000? 1 tlsmgr
rewrite unix - - n - - trivial-rewrite
bounce unix - - n - 0 bounce
defer unix - - n - 0 bounce
trace unix - - n - 0 bounce
verify unix - - n - 1 verify
flush unix n - n 1000? 0 flush
proxymap unix - - n - - proxymap
proxywrite unix - - n - 1 proxymap
smtp unix - - n - - smtp
# When relaying mail as backup MX, disable fallback_relay to avoid MX loops
relay unix - - n - - smtp
-o smtp_fallback_relay=
# -o smtp_helo_timeout=5 -o smtp_connect_timeout=5
showq unix n - n - - showq
error unix - - n - - error
retry unix - - n - - error
discard unix - - n - - discard
local unix - n n - - local
virtual unix - n n - - virtual
lmtp unix - - n - - lmtp
anvil unix - - n - 1 anvil
scache unix - - n - 1 scache
#
# ====================================================================
# Interfaces to non-Postfix software. Be sure to examine the manual
# pages of the non-Postfix software to find out what options it wants.
#
# Many of the following services use the Postfix pipe(8) delivery
# agent. See the pipe(8) man page for information about ${recipient}
# and other message envelope options.
# ====================================================================
#
# maildrop. See the Postfix MAILDROP_README file for details.
# Also specify in main.cf: maildrop_destination_recipient_limit=1
#
#maildrop unix - n n - - pipe
# flags=DRhu user=vmail argv=/usr/local/bin/maildrop -d ${recipient}
#
# ====================================================================
#
# The Cyrus deliver program has changed incompatibly, multiple times.
#
#old-cyrus unix - n n - - pipe
# flags=R user=cyrus argv=/usr/lib/cyrus-imapd/deliver -e -m ${extension} ${user}
#
# ====================================================================
#
# Cyrus 2.1.5 (Amos Gouaux)
# Also specify in main.cf: cyrus_destination_recipient_limit=1
#
#cyrus unix - n n - - pipe
# user=cyrus argv=/usr/lib/cyrus-imapd/deliver -e -r ${sender} -m ${extension} ${user}
#
# ====================================================================
#
# See the Postfix UUCP_README file for configuration details.
#
#uucp unix - n n - - pipe
# flags=Fqhu user=uucp argv=uux -r -n -z -a$sender - $nexthop!rmail ($recipient)
#
# ====================================================================
#
# Other external delivery methods.
#
#ifmail unix - n n - - pipe
# flags=F user=ftn argv=/usr/lib/ifmail/ifmail -r $nexthop ($recipient)
#
#bsmtp unix - n n - - pipe
# flags=Fq. user=bsmtp argv=/usr/local/sbin/bsmtp -f $sender $nexthop $recipient
#
#scalemail-backend unix - n n - 2 pipe
# flags=R user=scalemail argv=/usr/lib/scalemail/bin/scalemail-store
# ${nexthop} ${user} ${extension}
#
#mailman unix - n n - - pipe
# flags=FR user=list argv=/usr/lib/mailman/bin/postfix-to-mailman.py
# ${nexthop} ${user}
dovecot unix - n n - - pipe
flags=DRhu user=vmail:mail argv=/usr/libexec/dovecot/deliver -d $(recipient)
scan unix - - n - 16 smtp
-o smtp_data_done_timeout=1200
-o smtp_send_xforward_command=yes
-o disable_dns_lookups=yes
127.0.0.1:10026 inet n - n - 16 smtpd
-o receive_override_options=no_unknown_recipient_checks,no_header_body_checks
-o content_filter=
-o local_recipient_maps=
-o relay_recipient_maps=
-o smtpd_restriction_classes=
-o smtpd_client_restrictions=
-o smtpd_helo_restrictions=
-o smtpd_sender_restrictions=
-o smtpd_recipient_restrictions=permit_mynetworks,reject
-o mynetworks_style=host
-o smtpd_authorized_xforward_hosts=127.0.0.0/8
# spamassassin
spamfilter unix - n n - - pipe
flags=Rq user=spamfilter argv=/usr/bin/spamc -f -e /usr/sbin/sendmail -oi -f ${sender} ${recipient}
Настроим нашу базу mySQL
Стартуем сервис:
Настроим базовую безопасность:
NOTE: RUNNING ALL PARTS OF THIS SCRIPT IS RECOMMENDED FOR ALL MySQL
SERVERS IN PRODUCTION USE! PLEASE READ EACH STEP CAREFULLY!
In order to log into MySQL to secure it, we'll need the current
password for the root user. If you've just installed MySQL, and
you haven't set the root password yet, the password will be blank,
so you should just press enter here.
Enter current password for root (enter for none):
OK, successfully used password, moving on...
Setting the root password ensures that nobody can log into the MySQL
root user without the proper authorisation.
Set root password? [Y/n] н
New password:
Re-enter new password:
Password updated successfully!
Reloading privilege tables..
... Success!
By default, a MySQL installation has an anonymous user, allowing anyone
to log into MySQL without having to have a user account created for
them. This is intended only for testing, and to make the installation
go a bit smoother. You should remove them before moving into a
production environment.
Remove anonymous users? [Y/n] n
... skipping.
Normally, root should only be allowed to connect from 'localhost'. This
ensures that someone cannot guess at the root password from the network.
Disallow root login remotely? [Y/n] y
... Success!
By default, MySQL comes with a database named 'test' that anyone can
access. This is also intended only for testing, and should be removed
before moving into a production environment.
Remove test database and access to it? [Y/n] y
- Dropping test database...
... Success!
- Removing privileges on test database...
... Success!
Reloading the privilege tables will ensure that all changes made so far
will take effect immediately.
Reload privilege tables now? [Y/n] y
... Success!
Cleaning up...
All done! If you've completed all of the above steps, your MySQL
installation should now be secure.
Thanks for using MySQL!
Создадим базу mail; пользователя postfix с паролем password и дадим ему все права на базу mail; после чего обновим права;
Добавим строчку в /etc/my.cnf: чтобы демом висел только на localhost
/etc/my.cnf:
bind-address=127.0.0.1
Создадим файл с запросами к БД:
Создадим файлы:
valias.cf:
password = password
hosts = 127.0.0.1
dbname = mail
table = alias
select_field = goto
where_field = address
additional_conditions = and active = '1'
#query = SELECT goto FROM alias WHERE address='%s' AND active = '1'
vdomains.cf:
password = password
hosts = 127.0.0.1
dbname = mail
table = domain
select_field = domain
where_field = domain
additional_conditions = and backupmx = '0' and active = '1'
vmailbox.cf:
password = password
hosts = 127.0.0.1
dbname = mail
table = mailbox
select_field = CONCAT(domain,'/',maildir)
where_field = username
additional_conditions = and active = '1'
#query = SELECT CONCAT(domain,'/',maildir) FROM mailbox WHERE username='%s'AND active = '1'
Настройка dovecot:
Приведем файл /etc/dovecot/dovecot.conf к следующему виду
listen = *
shutdown_clients = yes
mail_uid = 1000
mail_gid = 1000
first_valid_uid = 1000
last_valid_uid = 1000
mail_debug = yes
auth_verbose = yes
auth_debug = yes
auth_debug_passwords = yes
ssl = no
#ssl_cert = #ssl_key =
disable_plaintext_auth = no
mail_location = maildir:/var/vmail/%d/%n/Maildir
auth_default_realm = iptel.com.ua
auth_mechanisms = PLAIN LOGIN CRAM-MD5
service auth {
unix_listener /var/spool/postfix/dovecot-auth {
user = postfix
group = postfix
mode = 0660
}
unix_listener auth-master {
user = vmail
group = mail
mode = 0660
}
unix_listener auth-userdb {
user = vmail
group = mail
mode = 0660
}
}
userdb {
args = /etc/dovecot-sql.conf
driver = sql
}
passdb {
args = /etc/dovecot-sql.conf
driver = sql
}
Создадим файл /etc/dovecot-sql.conf:
connect = host=localhost dbname=mail user=postfix password=password
default_pass_scheme = MD5
user_query = SELECT '/var/vmail/%d/%n' as home, 'maildir:/var/vmail/%d/%n'as mail, 1000 AS uid, 12 AS gid, concat('dirsize:storage=', quota) AS quota FROM mailbox WHERE username = '%u' AND active = '1'
password_query = SELECT username as user, password, '/var/vmail/%d/%n' as userdb_home, 'maildir:/var/vmail/%d/%n' as userdb_mail, 1000 as userdb_uid, 12 as userdb_gid FROM mailbox WHERE username = '%u' AND active = '1'
Установка и настройка web-интерфейса postfixadmin для управления почтовыми ящиками и доменами.
Установим web-сервер и некоторые пакеты необходимые для postfixadmin
Внесем некоторые изменения в файл /var/www/html/postfixadmin/config.inc.php
$CONF['setup_password'] = 'changeme';
$CONF['postfix_admin_url'] = '';
$CONF['postfix_admin_path'] = dirname(__FILE__);
$CONF['default_language'] = 'en';
$CONF['database_type'] = 'mysql';
$CONF['database_host'] = 'localhost';
$CONF['database_user'] = 'postfix';
$CONF['database_password'] = 'password';
$CONF['database_name'] = 'mail';
.........................
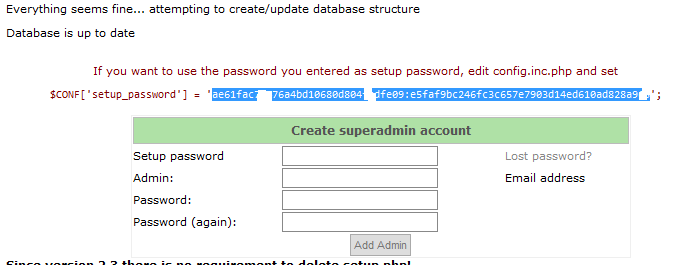
Переходим по ссылке: http://31.131.16.241/postfixadmin/setup.php
Создадим пользователя, который будет администрировать почтовый сервер-позднее через web-интерфейс postfixadmin, можно будет создать дополнительных администраторов:
Хэш пароля нужно также вставить в /var/www/html/postfixadmin/config.inc.php
Следует удалить файл
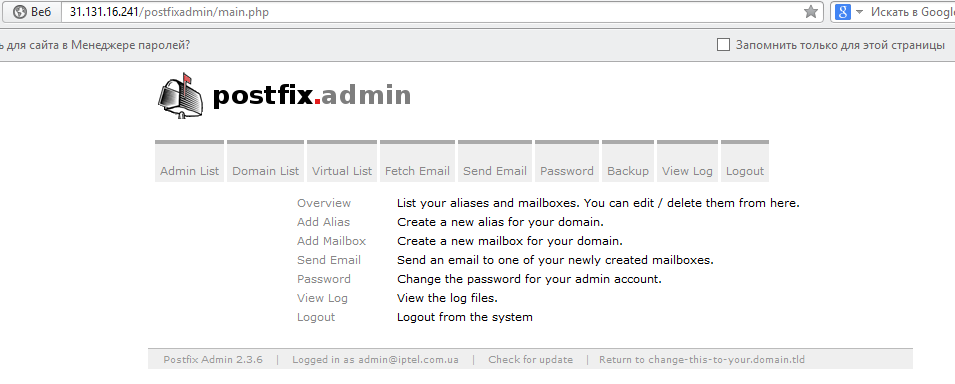
После логина мы попадем в панель управления postfixadmin нашим почтовым сервером.
Установка и настройка Clamav и clamsmtp:
Для проверки почты на наличие вирусов будем использовать clamav и clamsmtp для связки с postfix:
clamav находится в epel repository package; подключим его и установим clamav
Установим clamav из репозитория epel:
Настройка clamd: /etc/clamd.conf:
LogFileMaxSize 0
LogTime yes
LogSyslog yes
PidFile /var/run/clamav/clamd.pid
TemporaryDirectory /var/tmp
DatabaseDirectory /var/lib/clamav
LocalSocket /var/run/clamav/clamd.sock
FixStaleSocket yes
TCPSocket 3310
TCPAddr 127.0.0.1
MaxConnectionQueueLength 30
MaxThreads 50
ReadTimeout 300
User clam
AllowSupplementaryGroups yes
ScanPE yes
ScanELF yes
DetectBrokenExecutables yes
ScanOLE2 yes
ScanArchive yes
ArchiveBlockEncrypted no
ScanMail yes
ScanHTML yes
Обновление баз данных антивируса clamav:
ClamSMTP – это SMTP-фильтр, который позволяет взаимодействовать Postfix и ClamAV установим из исходников:
Конфигурационный файл /etc/clamsmtpd.conf:
TimeOut: 180
KeepAlives: 0
XClient: on
Listen: 127.0.0.1:10025
ClamAddress: /var/run/clamav/clamd.sock
Header: X-Virus-Scanned: ClamAV using ClamSMTP
TempDirectory: /tmp
Action: drop
Quarantine: on
User: clam
Бороться со СПАМОМ будем с помощью spamassassin:
Добавим пользователя:
Конфигурационный файл /etc/mail/spamassassin/local.cf:
report_safe 0
rewrite_header Subject ****SPAM****
use_bayes 1
bayes_path /etc/mail/spamassassin/bayes
bayes_file_mode 0666
bayes_learn_to_journal 1
bayes_min_ham_num 50
bayes_min_spam_num 50
score SUBJ_FULL_OF_8BITS 0.00
score HTML_COMMENT_8BITS 0.01
score HEADER_8BITS 0.00
score TO_NO_USER 0.01
score FORGED_MUA_OUTLOOK 0.5
score X_AUTH_WARNING 0.01
score SUBJ_HAS_UNIQ_ID 9.99
score HTTP_USERNAME_USED 9.99
score FORGED_YAHOO_RCVD 9.99
score FORGED_JUNO_RCVD 16
score UNWANTED_LANGUAGE_BODY 1.02
score MLM 5.55
score RCVD_NUMERIC_HELO 4.95
ok_locales en ru
whitelist_from root@localhost
whitelist_from_rcvd *@iptel.com.ua iptel.com.ua
blacklist_from *@outblaze.com
auto_whitelist_path /etc/mail/spamassassin/auto-whitelist
auto_whitelist_file_mode 0666
Запускам сервисы и добавляем их в автозагрузку:
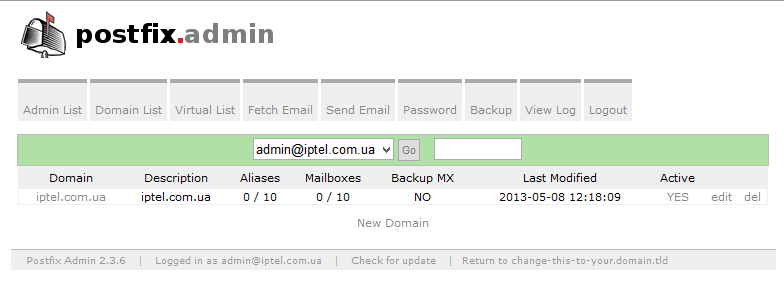
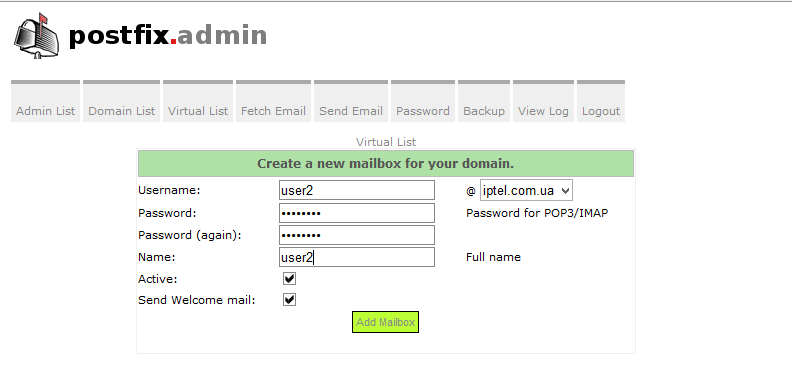
Добавим домен и несколько пользователей через postfixadmin:
RoundCube Webmail — это клиент для работы с электронной почтой с веб-интерфейсом
Установка roundcube:
Создадим MySQL базу для roundcube:
mysql> grant all on roundcube.* to 'roundcube'@'localhost' identified by 'password';
mysql> flush privileges;
mysql> quit
Добавляем в файле /etc/php.ini
Установим php-xml
Далее переходим к установке roundcube:
http://IP/roundcubemail-0.9.0/installer/
Меняем настройки подключения к базе roundcube:
Через удобный web-интерфейс roundcube пользователи смогут принимать, отправлять и сортировать почту.
